


Why sacrifice delicious food while managing diabetes instead choose right ingredients and smart cooking techniques. This way let you enjoy meals which are satisfying and will not spike your blood sugar drastically.
Recent studies indicate that the order in which you eat foods can influence post-meal blood sugar levels. Let’s deep dive into this and explore variety recipes which keep glucose level stable without sacrificing taste and comfort.
How To Eat in a way That Minimizes Blood Sugar Spikes?
Research published in Diabetes Care found that eating vegetables and protiens before carbohydrates can significantly reduce postprandial (after meal) glucose spikes. This “meal sequence” strategy works because fiber and protien slow the absorption of sugars, thereby lessening the rapid rise in blood sugar levels.
The glycemic index (GI) measures how quickly food that contain carbohydrate, raises blood sugar. Lower GI foods tend to cause slower, smaller increases in blood sugar levels. Research suggests that choosing low GI foods and pairing them with high-fiber or protien food which contribute more stable blood sugar profile after meals.
Here are the top 10 diabetic recipes that are shockingly delicious:
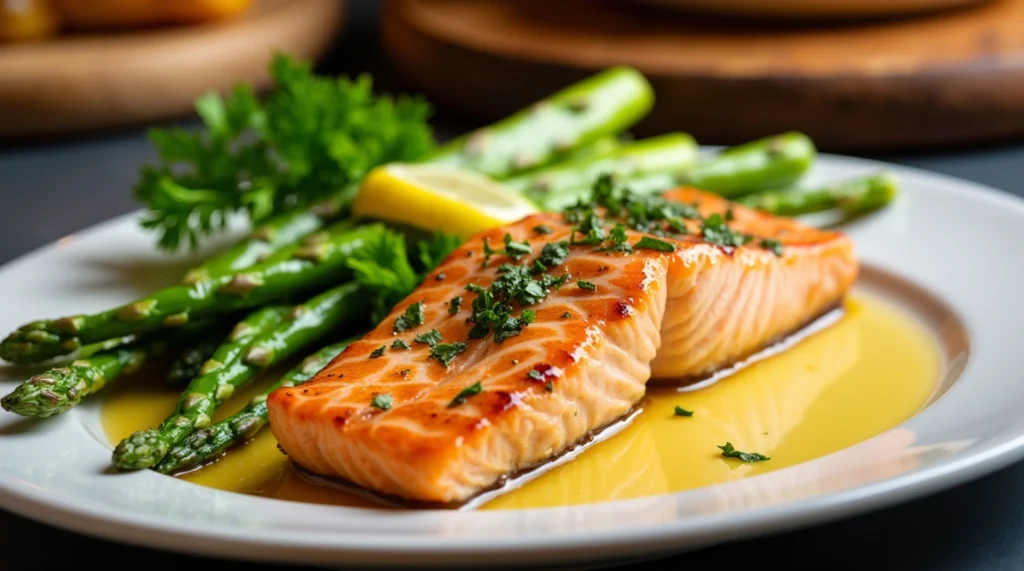
1. Garlic Butter Salmon with Asparagus
Why?
- Salmon’s omega-3s reduce inflammation and improve insulin sensitivity.
- Asparagus is low-carb, high-fiber, and rich in chromium (helps regulate blood sugar).
Step-by-step cooking guide:
Prep Time: 10 mins
Cook Time: 15–20 mins
Serves: 2
Ingredients:
- 2 salmon fillets (skin-on or skinless, your call)
- 1 bunch of fresh asparagus (trim off the woody ends)
- 3 tbsp unsalted butter (or olive oil for a lighter touch)
- 4 cloves garlic (minced)
- Juice of ½ lemon (plus slices for garnish)
- Salt & black pepper (to taste)
- 1 tsp paprika or chili flakes (optional for a kick)
- Fresh parsley (for garnish)
Instructions:
1. Prep the ingredients
- Pat salmon fillets dry with paper towels. Season both sides with salt, pepper, and paprika if using.
- Rinse asparagus and trim about 1-2 inches off the bottom.
2. Make the garlic butter
- In a small bowl, mix softened butter with minced garlic and a little lemon juice. Set aside. (If using olive oil, you’ll sauté the garlic directly in the pan.)
3. Sear the salmon
- Heat a nonstick or cast-iron skillet over medium heat. Add 1 tbsp of the garlic butter (or oil).
- Place salmon skin-side down (if using skin-on) and sear for 4–5 minutes until a golden crust forms.
- Flip and cook another 3–4 minutes, depending on thickness. Remove salmon and set aside (cover loosely with foil).
4. Sauté the asparagus
- In the same pan, toss in the remaining garlic butter.
- Add asparagus, season with salt & pepper, and cook for 5–7 minutes until tender-crisp. Stir occasionally so garlic doesn’t burn.
- Add a squeeze of lemon juice over the asparagus.
5. Bring it all together
- Return the salmon to the pan for a final warm-through (1–2 minutes).
- Optional: Garnish with fresh parsley and lemon slices.
This dish hits the perfect balance—rich in protein, healthy fats, low in carbs, and packed with flavor. A go-to for busy nights and blood sugar control.
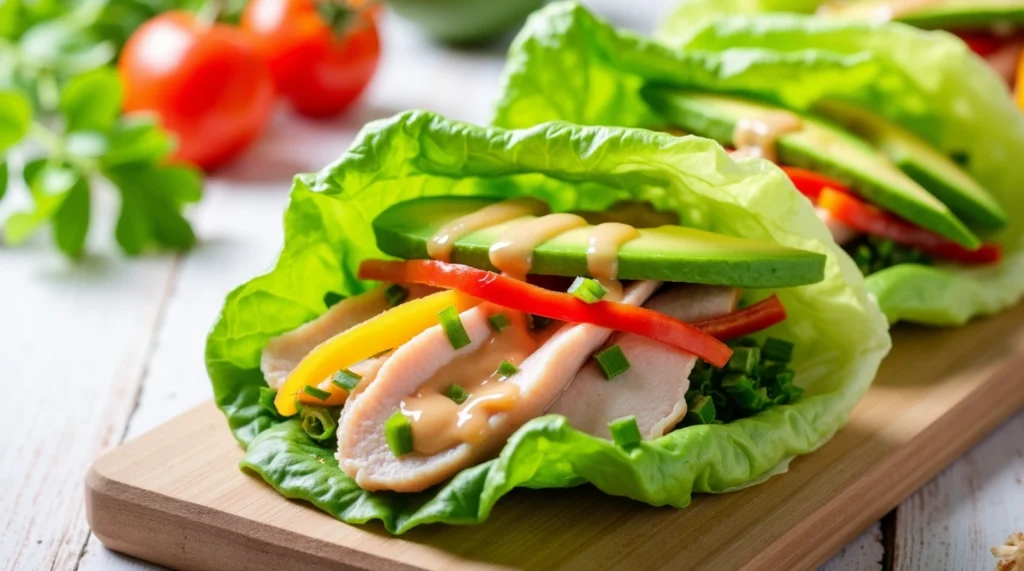
2. Turkey & Avocado Lettuce Wraps
Why?
- Turkey is lean protein (minimizes blood sugar spikes).
- Avocado adds healthy fats to slow digestion and stabilize glucose.
- Lettuce replaces high-carb tortillas.
Step-by-step cooking guide:
Prep Time: 10 mins
No Cooking Needed
Serves: 2–3
Ingredients:
- 8 large romaine, butter, or iceberg lettuce leaves (washed and dried)
- 1 ripe avocado (sliced or mashed)
- 8 slices of deli turkey breast (look for low-sodium, nitrate-free)
- 1 small tomato (diced or sliced thin)
- ½ cucumber (sliced thin or julienned)
- 2 tbsp plain Greek yogurt or hummus (optional spread)
- Salt & pepper to taste
- A squeeze of lemon or lime juice
- Optional toppings: shredded carrots, sprouts, red onion, or mustard
Instructions:
1. Prep your base
- Lay out your lettuce leaves on a plate or cutting board. Double up leaves for extra strength if needed.
2. Build the wraps
- Spread a small layer of Greek yogurt or hummus on each lettuce leaf.
- Layer in a slice or two of turkey, avocado, tomato, and cucumber.
- Sprinkle with salt, pepper, and a dash of lemon or lime juice.
3. Wrap & roll
- Carefully roll or fold each lettuce leaf like a taco or burrito. Use a toothpick to secure if needed.
4. Serve
- Plate and enjoy immediately, or wrap tightly in parchment paper for an on-the-go option.
Diabetic-Friendly Tips:
- Turkey provides lean protein to help stabilize blood sugar.
- Avocado adds healthy fats and fiber to slow digestion.
- Lettuce keeps it low-carb and crisp, no bread necessary.
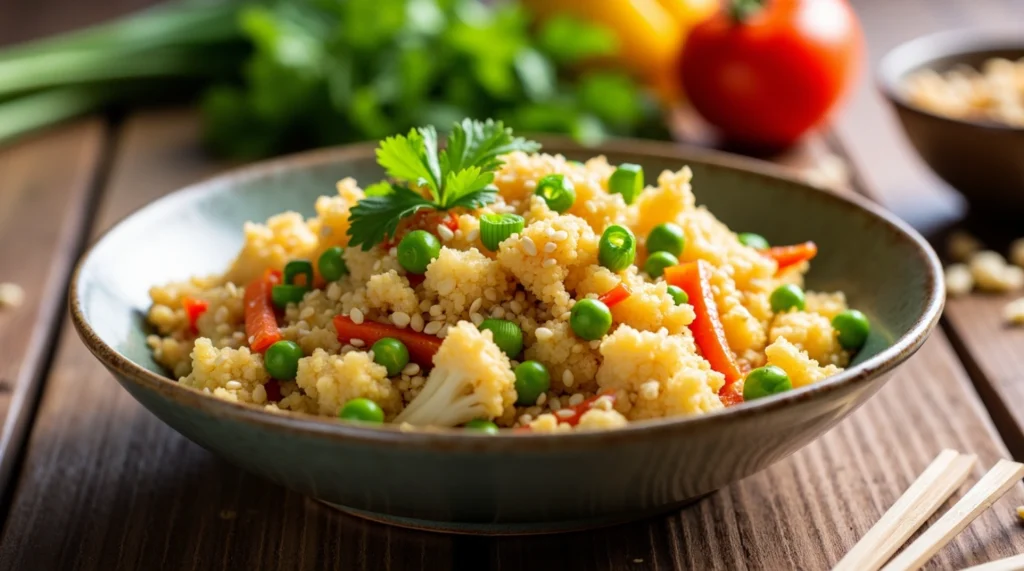
3. Cauliflower Fried “Rice”
Why?
- Cauliflower is low-carb (1/10th the carbs of white rice).
- Eggs and veggies add protein + fiber to prevent sugar crashes.
Step-by-step cooking guide:
Prep Time: 10 mins
Cook Time: 15 mins
Serves: 2–3
Ingredients:
- 1 medium head of cauliflower (or 3 cups pre-riced cauliflower)
- 2 eggs, lightly beaten
- 1 cup mixed vegetables (like peas, carrots, bell peppers, or green beans)
- 2 green onions, sliced
- 2 garlic cloves, minced
- 1 tbsp low-sodium soy sauce or tamari
- 1 tbsp sesame oil (or olive oil)
- ½ tsp ground ginger (or fresh grated ginger)
- Salt & pepper to taste
- Optional: cooked chicken, shrimp, or tofu for extra protein
Instructions:
1. Rice the cauliflower
- If using a whole cauliflower, cut into florets and pulse in a food processor until it resembles rice. Don’t over-blend or it’ll get mushy.
2. Sauté the veggies
- In a large skillet or wok, heat sesame oil over medium heat.
- Add garlic, ginger, and mixed veggies. Stir-fry for 3–4 minutes until slightly tender.
3. Cook the cauliflower rice
- Add the riced cauliflower to the skillet. Cook for 5–7 minutes, stirring often, until it softens and starts to brown slightly.
4. Add the eggs
- Push the rice to one side of the pan. Pour the beaten eggs into the empty space and scramble until cooked.
- Mix the eggs into the cauliflower rice.
5. Finish it off
- Stir in soy sauce and green onions. Season with salt and pepper to taste.
- Add optional protein here if you’re using it, and stir everything to combine.
Diabetic-Friendly Tips:
- Cauliflower is low in carbs and packed with fiber—perfect for keeping blood sugar stable.
- Skip the takeout and control sodium by using low-sodium soy sauce.
- Add lean protein for longer-lasting fullness.
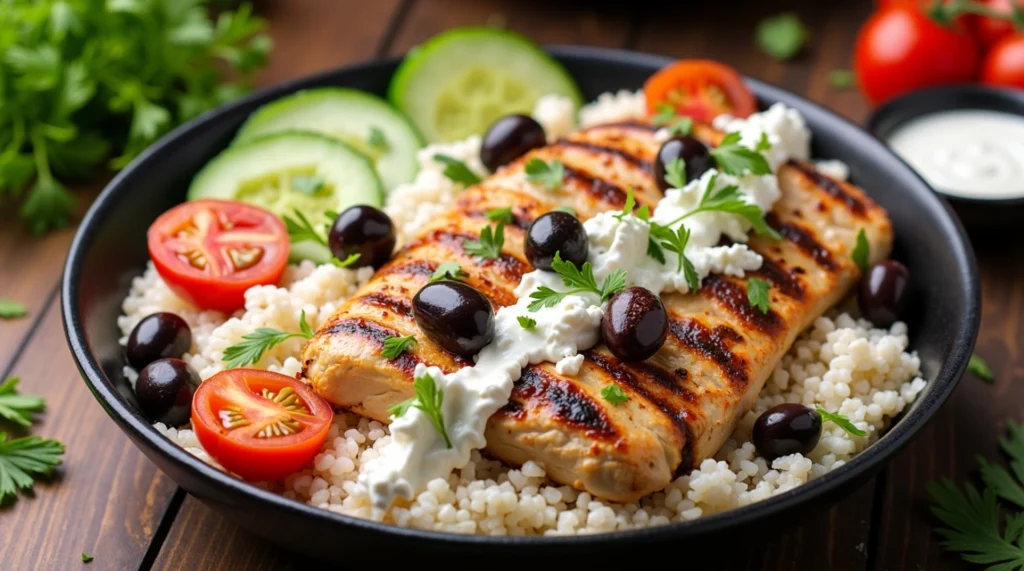
4. Greek Chicken Bowls
Why?
- Chicken provides satiating protein.
- Quinoa is a low-glycemic grain (higher fiber than rice).
- Cucumbers and olives add fiber + healthy fats.
Step-by-step cooking guide:
Prep Time: 15 mins
Cook Time: 20 mins
Serves: 2–3
Ingredients:
For the Chicken:
- 2 boneless, skinless chicken breasts (or thighs)
- 2 tbsp olive oil
- Juice of 1 lemon
- 2 garlic cloves, minced
- 1 tsp dried oregano
- ½ tsp paprika
- Salt & black pepper to taste
For the Bowl Base:
- 1 cup cooked quinoa or cauliflower rice
- 1 cup chopped cucumber
- 1 cup cherry tomatoes, halved
- ½ red onion, thinly sliced
- ½ cup kalamata olives (optional, for that true Greek flair)
- ¼ cup crumbled feta cheese (optional but tasty)
For the Tzatziki (optional):
- ½ cup plain Greek yogurt
- ¼ cucumber, grated
- 1 garlic clove, minced
- 1 tsp lemon juice
- Salt & dill to taste
Instructions:
1. Marinate the chicken
- In a bowl, whisk together olive oil, lemon juice, garlic, oregano, paprika, salt, and pepper.
- Add chicken and let it marinate for at least 15 minutes (longer if you can!).
2. Cook the chicken
- Heat a skillet or grill pan over medium heat. Cook the chicken for 6–7 minutes per side or until fully cooked and nicely browned.
- Let rest for a few minutes, then slice into strips.
3. Make the tzatziki (optional)
- Mix all tzatziki ingredients in a small bowl. Chill until ready to serve.
4. Assemble the bowls
- Start with your base (quinoa or cauliflower rice).
- Top with sliced chicken, cucumbers, tomatoes, red onions, olives, and feta.
- Drizzle with tzatziki or a splash of lemon-olive oil dressing.
Why It’s Blood Sugar Friendly:
- Lean chicken = great source of protein for steady energy
- Cauliflower rice or quinoa = low-glycemic base
- Veggies = fiber-rich and full of antioxidants
- Tzatziki (Greek yogurt) = adds healthy fat + gut-friendly probiotics.
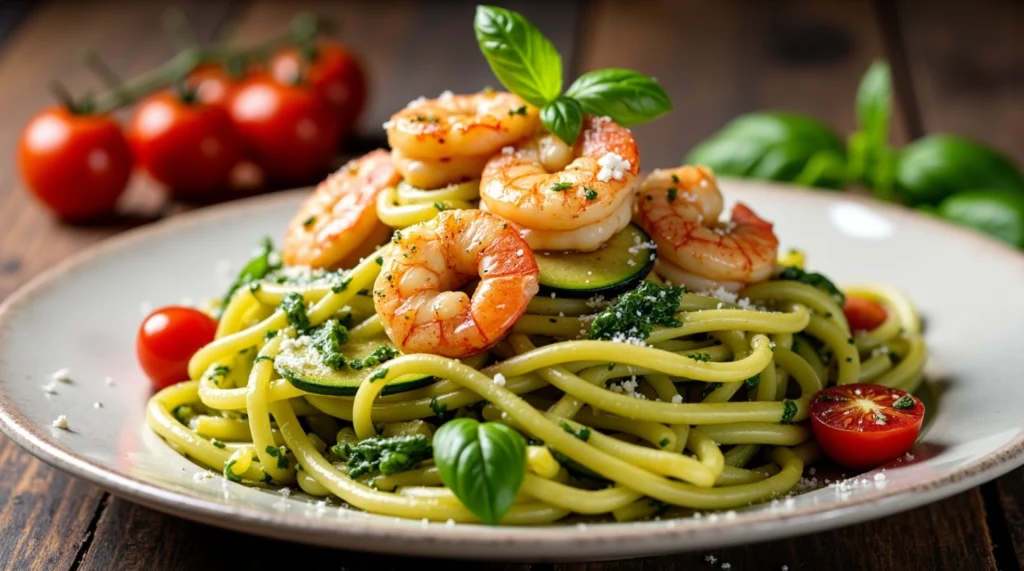
5. Zucchini Noodles with Pesto & Shrimp
Why?
- Zucchini is ultra-low-carb (great pasta substitute).
- Shrimp is high-protein, zero-carb.
- Pesto’s olive oil and nuts slow carb absorption.
Step-by-step cooking guide:
Prep Time: 10 mins
Cook Time: 10 mins
Serves: 2
Ingredients:
- 2 medium zucchinis, spiralized (or buy pre-spiralized “zoodles”)
- ½ lb (about 225g) shrimp, peeled and deveined
- 2 tbsp olive oil, divided
- 2–3 tbsp pesto (store-bought or homemade)
- 2 cloves garlic, minced
- Juice of ½ lemon
- Salt & black pepper to taste
- Optional: cherry tomatoes, red pepper flakes, grated Parmesan
Instructions:
1. Prep the zucchini noodles
- If spiralizing fresh zucchini, pat dry with paper towels to remove excess moisture. Set aside.
2. Sauté the shrimp
- In a large skillet, heat 1 tbsp olive oil over medium heat.
- Add garlic and cook for 30 seconds until fragrant.
- Add shrimp, season with salt and pepper, and cook 2–3 minutes per side, or until pink and opaque. Remove from pan and set aside.
3. Cook the zucchini noodles
- In the same pan, add another tablespoon of olive oil and the zucchini noodles.
- Sauté for 2–3 minutes until just tender (don’t overcook—they can get soggy).
- Stir in pesto and lemon juice. Toss to coat evenly.
4. Bring it all together
- Return the shrimp to the pan. Toss everything together gently until warmed through.
5. Serve
- Plate and garnish with cherry tomatoes, a sprinkle of Parmesan, or red pepper flakes if desired.
Diabetic-Friendly Highlights:
- Zucchini keeps it low-carb and packed with fiber
- Shrimp = lean protein that helps keep blood sugar stable
- Pesto adds healthy fats from olive oil and nuts, boosting flavor and satiety
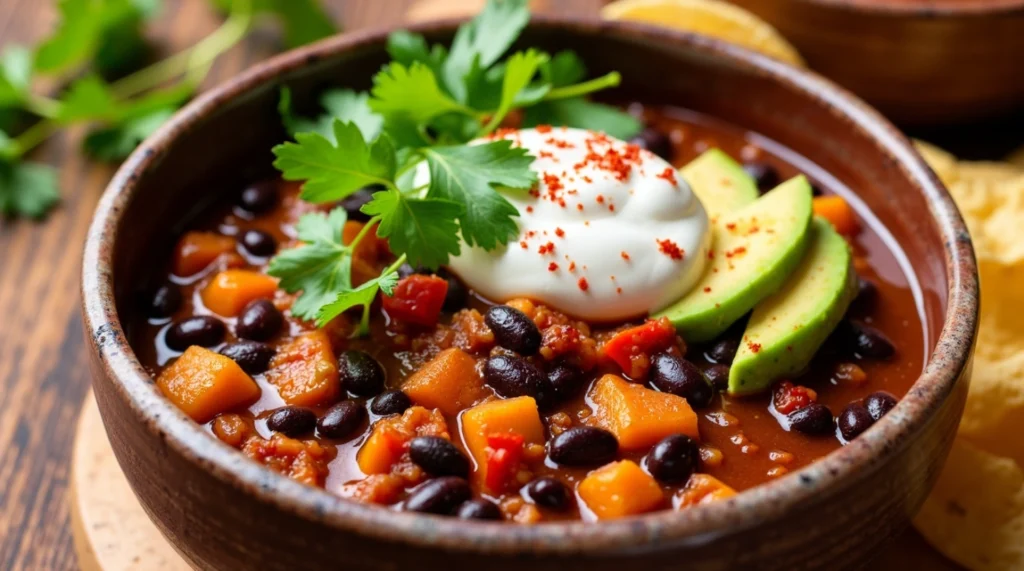
6. Black Bean & Sweet Potato Chili
Why?
- Black beans are high-fiber (1 cup = 15g fiber!).
- Sweet potatoes (in moderation) have lower GI than white potatoes.
- Fiber + protein combo blunts blood sugar spikes.
Step-by-step cooking guide:
Prep Time: 15 mins
Cook Time: 30–35 mins
Serves: 4
Ingredients:
- 1 tbsp olive oil
- 1 medium onion, diced
- 2 garlic cloves, minced
- 1 medium sweet potato, peeled and diced
- 1 red bell pepper, chopped
- 1 (15 oz) can black beans, drained and rinsed
- 1 (15 oz) can diced tomatoes (no added sugar)
- 1 ½ cups low-sodium vegetable or chicken broth
- 1 tsp chili powder
- 1 tsp cumin
- ½ tsp smoked paprika
- Salt & pepper to taste
- Optional toppings: avocado slices, chopped cilantro, Greek yogurt, lime wedges
Instructions:
1. Sauté the base
- Heat olive oil in a large pot over medium heat.
- Add onion and sauté for 3–4 minutes until translucent.
- Stir in garlic and cook for 30 seconds more.
2. Add the veggies & spices
- Add sweet potatoes, bell pepper, chili powder, cumin, smoked paprika, salt, and pepper.
- Cook for 5–7 minutes, stirring occasionally, to let the veggies start to soften.
3. Simmer it all together
- Pour in the diced tomatoes, black beans, and broth.
- Bring to a boil, then reduce heat and simmer for 20–25 minutes, until sweet potatoes are tender and chili thickens.
4. Adjust & serve
- Taste and adjust seasoning as needed.
- Serve hot with your favorite toppings!
Why It’s Great for Blood Sugar:
- Sweet potatoes offer slow-digesting carbs + fiber
- Black beans provide plant-based protein and steady energy
- No refined sugars, no heavy starches — just real, whole foods

7. Egg & Spinach Breakfast Muffins
Why?
- Eggs are zero-carb, high-protein (keeps morning glucose stable).
- Spinach adds magnesium (linked to improved insulin function).
Step-by-step cooking guide:
Prep Time: 10 mins
Cook Time: 20–25 mins
Makes: 6–8 muffins
Ingredients:
- 6 large eggs
- 1 cup fresh spinach, chopped
- ¼ cup milk (or unsweetened almond milk)
- ⅓ cup shredded cheese (cheddar, feta, or your favorite)
- ¼ cup diced bell peppers or tomatoes (optional)
- Salt & black pepper to taste
- Olive oil or nonstick spray for greasing
Instructions:
1. Preheat and prep
- Preheat your oven to 375°F (190°C).
- Lightly grease a muffin tin with olive oil or nonstick spray.
2. Mix the egg base
- In a bowl, whisk together the eggs, milk, salt, and pepper.
- Stir in chopped spinach, cheese, and any optional veggies.
3. Fill the muffin tin
- Pour the mixture evenly into the muffin cups, filling each about ¾ full.
4. Bake
- Bake for 20–25 minutes, or until the muffins are puffed and the centers are set.
- Let cool slightly before removing from the tin.
Why It’s Great for Blood Sugar:
- High in protein = helps keep you full and your blood sugar steady
- Low in carbs = no insulin spike first thing in the morning
- Spinach adds fiber + nutrients without extra sugar
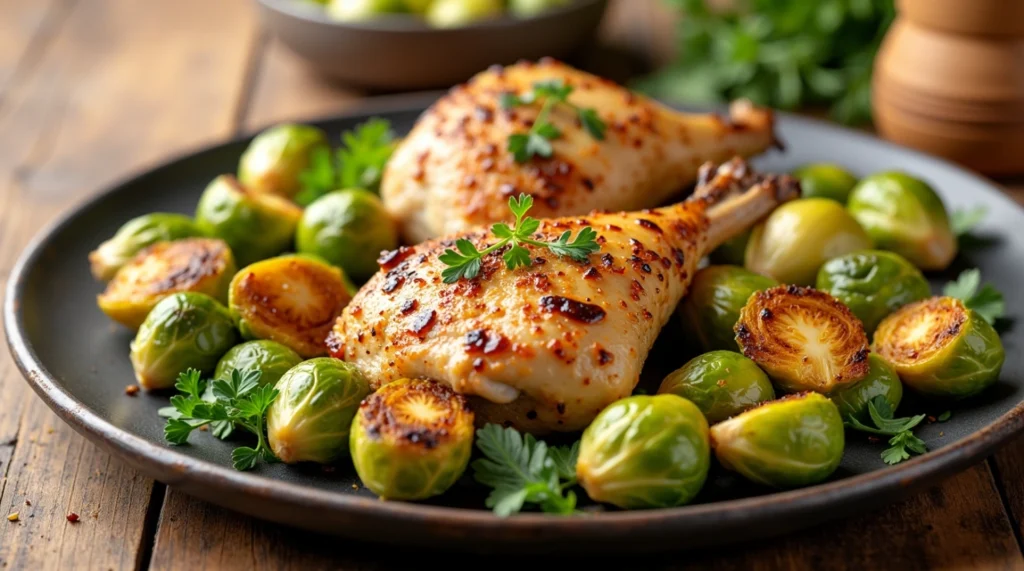
8. Baked Chicken Thighs with Brussels Sprouts
Why?
- Chicken thighs (with skin) provide healthy fats + protein.
- Brussels sprouts are high-fiber, low-carb, and contain alpha-lipoic acid (may improve insulin sensitivity).
Step-by-step cooking guide:
Prep Time: 10 mins
Cook Time: 35–40 mins
Serves: 3–4
Ingredients:
- 4 bone-in, skin-on chicken thighs (or boneless if preferred)
- 3 cups Brussels sprouts, trimmed and halved
- 2 tbsp olive oil (divided)
- 3 garlic cloves, minced
- 1 tsp dried thyme or rosemary
- ½ tsp paprika (optional)
- Salt & black pepper to taste
- Juice of ½ lemon (for serving)
Instructions:
1. Preheat oven
- Preheat your oven to 400°F (200°C).
2. Season the chicken
- Pat chicken thighs dry and rub with 1 tbsp olive oil.
- Season with salt, pepper, paprika, and thyme or rosemary. Set aside.
3. Prep the Brussels sprouts
- In a bowl, toss halved Brussels sprouts with remaining olive oil, garlic, salt, and pepper.
4. Arrange on a baking sheet
- Place chicken thighs skin-side up on a parchment-lined baking sheet.
- Spread Brussels sprouts around the chicken in a single layer.
5. Bake
- Roast for 35–40 minutes, or until chicken is golden and cooked through (internal temp 165°F / 74°C).
- Brussels sprouts should be crispy on the edges and tender inside.
6. Finish & serve
- Squeeze lemon juice over everything before serving for a fresh kick.
Diabetic-Friendly Perks:
- Chicken thighs = high in protein and healthy fats for blood sugar balance
- Brussels sprouts = fiber-rich and low in carbs
- No heavy sauces or starches — just real, whole ingredients
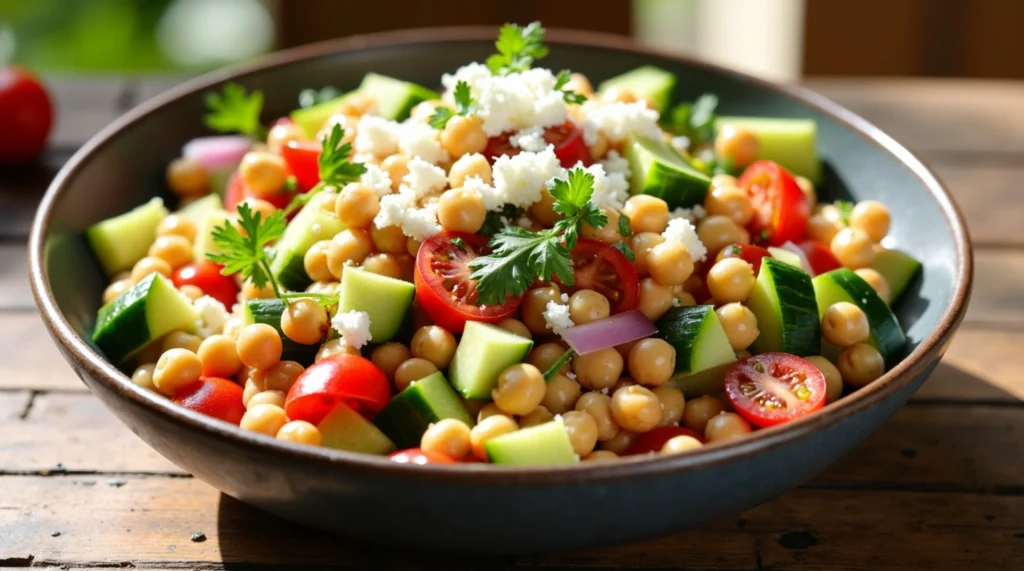
9. Mediterranean Chickpea Salad
Why?
- Chickpeas are high-fiber, moderate-protein (slow-digesting carbs).
- Olive oil dressing reduces glycemic response.
Step-by-step cooking guide:
Prep Time: 10–15 mins
No Cooking Needed
Serves: 3–4
Ingredients:
- 1 (15 oz) can chickpeas, drained and rinsed
- 1 cup cherry tomatoes, halved
- 1 cucumber, diced
- ¼ red onion, thinly sliced
- ½ cup crumbled feta cheese (optional)
- ¼ cup kalamata olives, pitted and halved
- 2–3 tbsp chopped fresh parsley
- Juice of 1 lemon
- 2 tbsp olive oil
- ½ tsp dried oregano
- Salt & black pepper to taste
Instructions:
1. Chop and prep
- Dice all fresh veggies and place them in a large mixing bowl with the chickpeas.
2. Make the dressing
- In a small bowl, whisk together olive oil, lemon juice, oregano, salt, and pepper.
3. Combine
- Pour the dressing over the salad ingredients.
- Add feta, olives, and parsley. Toss everything gently to combine.
4. Chill or serve
- Serve immediately or let it sit in the fridge for 20–30 minutes to let flavors meld.
Diabetic-Friendly Benefits:
- Chickpeas = great source of plant-based protein + complex carbs with fiber
- Olive oil & feta = healthy fats that help slow digestion and blood sugar spikes
- Veggies = loaded with vitamins and low in net carbs
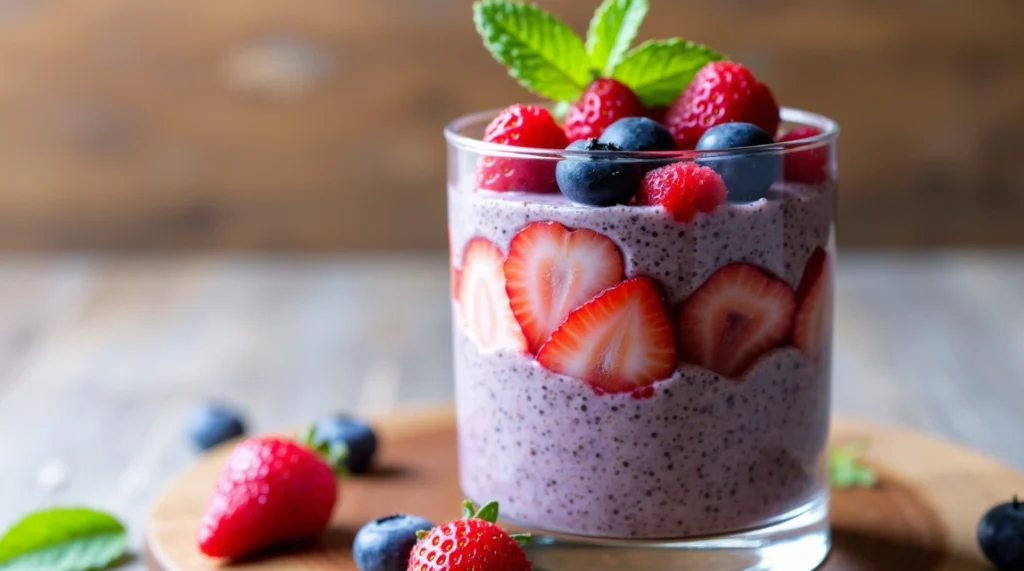
10. Sugar-Free Berry Chia Pudding
Why?
- Chia seeds are high-fiber (absorbs liquid, slows sugar absorption).
- Berries are low-glycemic (packed with antioxidants).
- Almond milk is low-carb, no added sugar.
Prep Time: 5 mins
Chill Time: 4 hours or overnight
Serves: 2
Ingredients:
- 2 tbsp chia seeds
- ¾ cup unsweetened almond milk (or any milk of choice)
- ¼ tsp vanilla extract
- ½ cup mixed berries (fresh or frozen)
- Optional: a few drops of stevia or monk fruit sweetener
- Optional toppings: shredded coconut, crushed nuts, extra berries
Instructions:
1. Mix it up
- In a jar or small bowl, stir together chia seeds, almond milk, vanilla, and optional sweetener.
- Let sit for 5 minutes, then stir again to prevent clumping.
2. Chill
- Cover and refrigerate for at least 4 hours or overnight until it thickens to a pudding-like texture.
3. Add berries
- Top with fresh or thawed frozen berries before serving. You can also mash some into the pudding for extra flavor.
4. Serve & enjoy
- Give it a quick stir and add any toppings you like!
Why It’s Great for Blood Sugar:
- Chia seeds = high in fiber and healthy fats that slow carb absorption
- No added sugar = sweetened naturally with berries and optional stevia
- Berries = low-glycemic fruit, full of antioxidants and vitamins


